Kitchen Table turned Sofa Table

Hey y'all! As promised, I have made this blog showing how I took an ordinary kitchen table and turned it into a sofa table. This was SO much fun to make!
Here is what the table looked like before -

It wasn't anything fancy. The table top was laminate and it slid apart to make the table bigger but it was missing the extra leaf. I had this table for over a year and I didn't really like it and I was lacking motivation and inspiration to redo it. Then, it just hit me! (you know.. about a year after picking it up ;) ) I decided I wanted to make this into a sofa table. So, here's what I did...
First, I removed the top. I just flipped it upside down and removed all of the screws that attached the table top to the base. Once I did that this is what it looked like..

This is obviously just a picture of one side of the tables base. But, this was now going to be the base for my sofa table. I just had to make a few modifications :)

I decided how deep I wanted the sofa table to be and I cut out the excess. In the picture above you can see that I just cut out a piece in the middle between both table legs. I repeated this same step on the other side of the tables base cutting and removing the same size of piece. I just used a hand saw to cut the wood.
Now, it was time to put each side back together!

I removed the excess piece. I held onto it because I was going to use it for the next step. I never waste any wood scraps ;) - I grabbed my wood glue and glued it back together. To hold it in place I clamped it together tightly. I let the glue dry. By this point it was getting late so I just left it like this over night.
The next morning I grabbed those two pieces of excess wood and...

I used the excess wood to help stabilize each side that I had cut and glued. I screwed it onto each new side of the tables base in the middle between each leg.
To cover the seem..
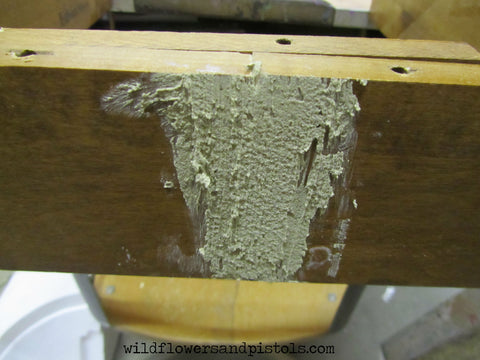
I used wood filler to help give each side a seamless look. Once the wood filler was dry I sanded it until it was completely smooth.
Now, I needed to attach the two base pieces together as one..

I cut two pieces of 1"x2"s and then screwed them to either side of the base to help stabilize and connect the base back together. (Also- I glued each base piece before attaching the 1"x2" boards then to cover the seem I applied wood filler. Then sanded smooth once dry.) The table was very sturdy!
Now, it needed a new top!

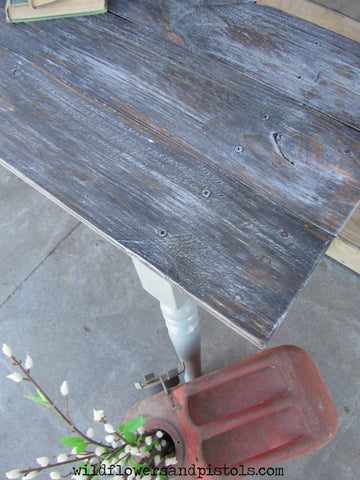
I screwed down 3 boards of reclaimed wood. I ended up not having to cut or modify any of the 3 boards (amazingly enough!) After screwing each board down attaching it to the base I sanded each board until it was smooth. Then I stained them using a dark walnut color. I decided I wanted the wood to resemble barn wood so I grabbed some W&P Milk Paint- Pearl and I dry brushed it onto each board. Next, I painted the base! I decided to use a custom mix of W&P Milk Paint to create a unique color. This new paint color will be released very soon!!! :D
Here's what the final product looks like!

Isn't this color awesome!? It's kind of like a sea foam color with a hint of gray. I wish everyone could see this piece and color in person! These pics just don't do it justice!
I am SO happy with how the new table top turned out! (I'll be writing a blog tutorial on how I did it sometime soon!)


And just for good measure here's a side by side before and after pic :)

I hope y'all love this as much as I do! But, what I hope even more is that this will inspire you to create something beautiful and help give you the confidence to get started! :)
~Heather
Comments
Carol mutter said:
Love! Love! Love! Your table